After building the hardtop for the boat, one of the next items needed was a replacement dodger. For those that don't own a boat, the dodger is essentially the front windshield for a boat. It isn't strictly necessary as, unlike a car, you aren't cruising along at speeds fast enough that something flying in from the front isn't likely to cause injury...but anyone that has spent much time at the helm of a boat on a less than perfect day may disagree. When we completed the hardtop in Virginia it was around Christmas and we were in a hurry to head to warmer locations. At the time I jury rigged the old dodger so we would have at least minimal protection.
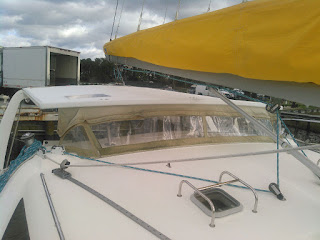 |
| The jury-rigged temporary dodger. |
During that cold and rainy trip south, it became very apparent that just a simple dodger up front wasn't really sufficient to protect someone at the helm from bad weather. The cold rain always seemed to be blowing in from the starboard side and that made manning the helm a miserable experience. So, back before this virus when I was looking at heading to the Bahamas in February, a better dodger and side protection...at least for the starboard side...was very high on the upgrade list.
Having an enclosure made was not going to be an option as that would be too costly for something just to improve comfort for the upcoming trip (small sailboat enclosures usually cost more than $4000 and I'm sure mine would be much higher due to the size). A while back we purchased a Sailrite sewing machine and part of the justification of that purchase was to tackle projects like this. My goal was to create a cost effective and serviceable solution that could be used when needed and taken down most of the time. Just like the hardtop, this would be my first time attempting to create something new for the boat, so higher end materials were less of a concern. If I really screwed things up, at least I wouldn't feel as bad about it if the materials didn't cost a fortune.
First thing was to come up with a design. At first blush, it seems like a fairly straight forward process...create some fabric and clear vinyl panels that would enclose the front and at least part of the sides of the cockpit. Of course, the devil is in the details. I wanted to utilize the existing lower mount for the old dodger and then there was what to do about the sheet winches that are right in the middle of where enclosure panels would normally go. Ideally, having all the winches inside the enclosure so you can stay dry while adjusting sails would be good, but in the end I could not figure out a way to make that happen. In the end I came up with a design for a front panel and two smaller side panels that would wrap around behind the winches so that one could at least operate the winches with the panels in place. I also planned for partial panels along the sides so the helm would be protected.
From there I came up with an estimate of how much clear vinyl and material was needed for the project. 5 yards of vinyl and 4 yards of material looked like it would be enough. Checking online, I was able to find a supposedly marine grade vinyl for about $85. Sunbrella, on the other hand was about $25 to $35 per yard. I decided to check a discount fabric store in nearby Wilmington and found they had a roll of Sunbrella in an off-white color that just about perfectly matched my gel-coat for $17 at yard. Another $100 worth of zippers, snaps, thread, pattern material, and other sewing notions from Sailrite as well as reusing a few zippers from the old dodger and it looks like I could make an enclosure for around $300. On that trip from Virginia, I'm sure my wife and I would have gladly paid $300 for the added comfort of a dry helm out of the wind.
 |
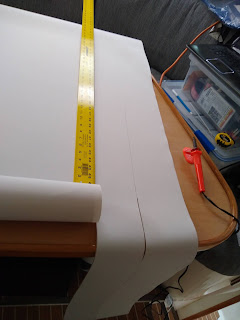
| Creating the dodger pattern. |
After watching and re-watching several of the how-to videos from Sailrite, I began the process of creating patterns for the front dodger. Of course, creating patterns by myself, outside, in the wind was a bit of a challenge. Trying to get the plastic stretched tight and marked before the wind would come along and blow it all down took several tries and in the end was not perfect...but good enough. Creating the dodger in the salon, when the dodger spans the distance across the salon and galley was an interesting task. I cut the Sunbrella material into the numerous strips I needed using a straight edge and wood burning tool. Fortunately some of the tricks I picked up from the how-to videos as well as judicious use of the Sailrite seam-stick basting tape for canvas helped a great deal with the assembly and sewing tasks. After a lot of sewing, I had a new dodger that took advantage of the extra viewing area afforded by the new hardtop.
 |
| Cutting long strips of Sunbrella |
Next came the two small panels that ran behind the winches. It was a pretty straight forward process to pattern and create those small panels out of the Sunbrella material. These panels extend past where the existing mounting hardware was, so I had to add snaps to hold the bottom of the panels. While on the Sailrite site I found that they had a new type of snap called a Snad that utilizes 3M VHB tape so I wouldn't have to drill holes in the hull for conventional snaps. The only downside to the VHB based solution that I've found thus far is that it takes up to 72 hours for the snaps to fully bond to the surface.
 |
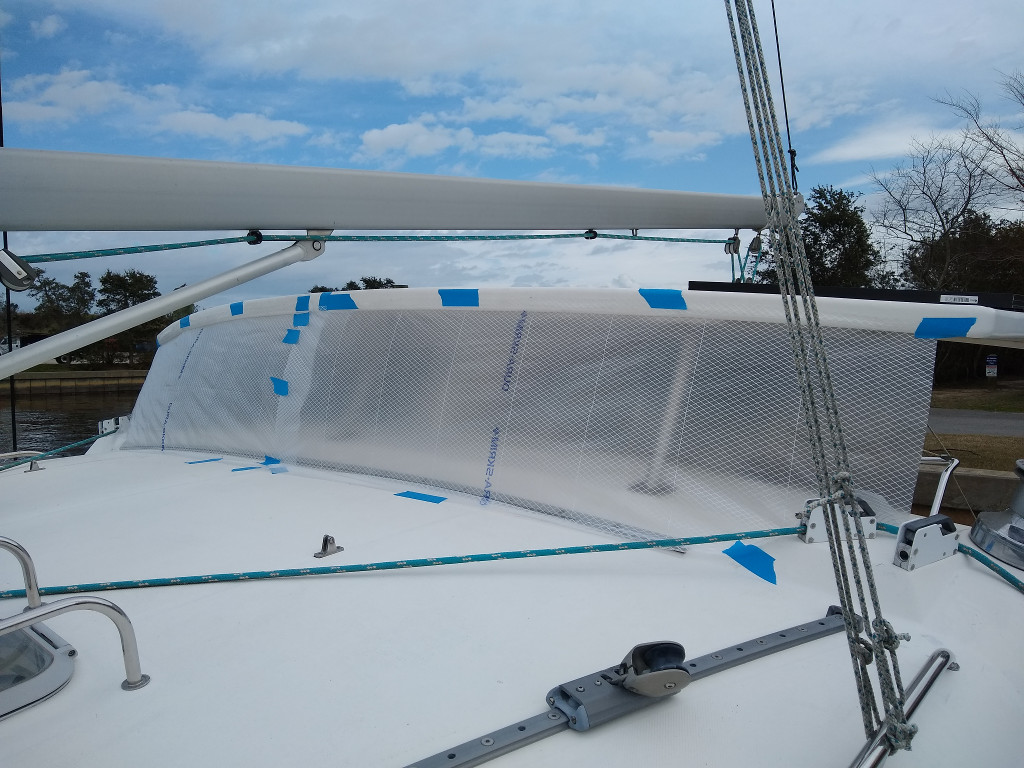
| Sewing the dodger. |
After getting the winch panels done, I realized I actually had enough material to make full side panels for the cockpit instead of the half-width panels that I originally planned to make. I was having a difficult time determining how to best secure the half panels, so this solved that problem...but created another. Snaps were less likely to hold such a large panel in place in the wind so I had to come up with another solution to attach the panel to the arch. While trying to figure out the best way to attach the panels, I went ahead and created the panels. When I made the hardtop, I included a design element that would hopefully aid in the installation of a full enclosure. The bottom of the "handrail" edge around the hardtop can be slit at the bottom creating an awning track. This track would then allow for installation of enclosure panels using a pre-manufactured bolt rope that slides into the slot. The solution for holding the panel to the arch is essentially the same solution. I took the old awning track that came off of the arch when I installed the hardtop, cut it in half, and attached the segments to the arch. One more zipper per panel and more of the bolt rope, and viola, the panel is attached. The boat now has a 3/4 enclosure, with the back left open.


The end result isn't perfect, but it is functional and doesn't look too bad. The vinyl isn't as optically clear as the expensive stuff (it has minor distortions that I think are due to the manufacturing process) but it is good enough and well worth the trade-off for keeping warm and dry. If I keep up with the maintenance of the vinyl (regular polish and UV protectant...same as is recommended for the much more expensive vinyl products), I have confidence that they will last a long time and will be a nice addition to the boat.


No comments:
Post a Comment