Tuesday, December 29, 2015

All Topped Up

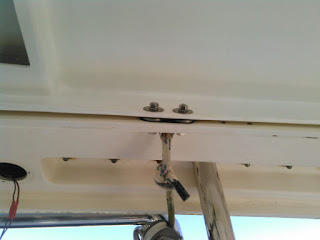
Hard to believe I'm saying this, but the weather was nice. Time to get this bimini project wrapped up. We start the day by re-drilling the epoxied holes in the top. Using the drill guide we were able to get the holes drilled pretty much in the center of the epoxy filled holes. It isn't easy holding the drill guide, drill angle adapter, and drill upside down while we bore two inch deep holes in the top, but after numerous breaks due to arm fatigue, we accomplished the task. Unfortunately I made the holes a little too close tolerance in size and had to ream them a size bigger to get everything to fit (easier to do with a guide hole, no guide required this time).

The hole drilling contraption

Of course, in filling the holes, I left a little too much resin on the top side and had to sand off the little "dome" that was created at each hole so we can get the fender washers to seat better against the top. Finally, we were ready to install the supports for the last time.

I decided to create thin rubber pads for the top of the supports where it meets the top.  These pads would help the top of the supports conform to the surface of the top and hopefully more evenly distribute the load.  I used the sheet of nitrile rubber we purchased to create the 1/16 inch pads and cut them to leave plenty of room around the screws (you don't want a seal at the bottom of the screw so any water that might leak through won't be trapped at the bottom). To bed the hardware and prevent leaking, butyl tape that I had previously purchased from Compass Marine was used.  I find this stuff to be an excellent bedding material for anything that is through-bolted, just as is the case for all of these supports.


For each support, I run a strip of butyl tape around the perimeter of the mounting pad that meets the cabin top and encircle each screw hole.  I then insert the screws in the mounting plate and carefully guide the support into position (this stuff is quite sticky, so I find using the screws as a guide is helpful).  We then line up the top and insert the bolts that will hold the top to the supports and temporarily install the fender washers and locking nuts.  Then, for each screw that holds the support to the cabin roof, we remove it, wrap the head with a little butyl tape, and reinsert it.  Once all the screws have the butyl applied, the head of the screw is held stationary while the fender washer and locking nut are installed. The whole thing is then slowly tightened using a crisscross torque pattern until the butyl is compressed a little.  Butyl tape is a bit putty-like, and we will need to re-tighten each of these a few times over the next day or so until it is fully seated in position.

Once the bottom of the support is attached, we return out attention to the screws holding the top to the support.  One by one, each nut and washer is removed, the screw is wrapped with butyl tape where it meets the top, and the tape is pressed around the screw and the top, and the fender washer and lock nut are reinstalled.  Just as before, we slowly tighten each nut using the crisscross pattern until everything is secure.

Three supports later, and the top that we have worked so long on is finally a permanent addition to our boat.  Taking a step back and looking at the whole thing, I have to admit I'm proud of the work that my wife and I have done.  We think the top looks pretty darn good.  Apparently we aren't the only ones as we have received a number of compliments from people who have been here to see it in person. We've been told it complements the boat nicely and looks like it could have come from the factory.  My wife even overheard one of the guys at the boatyard telling someone else that it looked like it came out of a mold.


Not bad at all for two amateur, first-time builders doing hand-laid-up fiberglass in a boatyard. I'd like to say the project is finished, but is any boat project ever really finished?  We have an enclosure to add, and solar panels, and lighting.  But the top itself is done!

Monday, December 28, 2015

Three Steps Forward, Two Steps Back

The title pretty much describes the feel of the work we have been doing the last few days.  It finally stopped raining and blowing, and we can deal with one or the other right now, but not both.  Wind by itself isn't much of an issue other than it can cause the top to wiggle just a bit.  Rain, of course, isn't good when you want to drill holes in a cored fiberglass panel (getting the core material wet can cause delamination and is very detrimental to the strength of the structure). We could put up a tarp to protect from the rain, but only if the wind isn't bad.

I just can't get away from those tarps.

Anyway, the weather was cooperating so it was time to get these supports installed.  The first step was to get them positioned correctly.  A task that is not as easy as it may sound.  The new top has a curve to it, and the cabin roof has a curve and a slope.  There are lots of angles to take into account, and getting the supports lined up properly is a bit of a task.  Oh, and don't forget nothing is attached so you have to hold the angled support (that won't stand on its own) while you attempt to mark drill holes...all while standing on a platform that is moving (boats are rarely ever completely still while in the water).

We put masking tape down in the general areas where the supports will be mounted and line them up as best we can.  While I try to hold the support still, my wife would hop off the boat and verify the alignment. Once the OK was given, I try drawing a line around the base and then mark the mount holes with one hand while I try holding the support motionless with the other.  We repeat this task until we have the mounting locations on the cabin roof marked.

Oh, I almost forgot...before we started, we had to disassemble the headliner in the salon.  The headliner consists of interlocking panels and a piece of fiberglass trim that needs to be removed so we can access the, soon to be, mounting holes.  The panels are oriented such that we have to remove the liner for the whole salon and galley area.  Now we have a bunch of big panels to trip over on the boat while we work on this project.

Bare salon roof, guess we'll clean that while the panels are down.

Drilling holes in the perfectly good structure of a boat always seems to make me a bit nervous. To make the task more interesting, we don't just drill holes and mount hardware in a cored deck, but drill the holes oversize, fill them with epoxy, and then drill smaller holes.  This encapsulates the core material and prevents any future leak from getting to the core.  It also provides some structure to allow bolts to be tightened without crushing the core material. (Core materials are typically designed to deal with shear stress but are not as good with localized compression stress.)

Drill with drill guide.

We drill the holes using a drill guide to help keep the hole straight.  This is important because the smaller holes drilled later will need to be centered in the larger holes.  I didn't oversize the holes a great deal, but instead elected to try a process that was described at Compass Marine. I drilled holes just large enough that I could insert a rotary tool cutting bit.  I then used the rotary tool to remove excess core material underneath the fiberglass skins.  The result is a hole with an enlarged cavity in the middle that will contain the epoxy sleeve and be trapped between the fiberglass.

Rotary tool with the cutting bit.

Then we take the two steps back and fill the hole we just drilled with epoxy.  I'm using epoxy for this as it has a bit better mechanical and adhesive properties than polyester resin.  We thicken the epoxy with the same fumed silica that was used to thicken the polyester.  I used duct tape to seal the holes at the bottom and a syringe to inject the resin.  Toothpicks were used to aid in getting the resin to sink to the bottom of the holes and allow any trapped air to escape (simply inserting them in the hole and then pulling them back out several times seems to have done the trick). All that work and the end result is resin colored dots in my cabin roof.

The epoxy "sleeve" that seals off the core material.

The next day we re-drill the holes using the same guide and a smaller bit.  I'm glad to report that the new holes were well centered in the old holes, all the way through the inch thick deck.  We mount the center support in the new holes and then mark the mounting location on the top. Then we remove the support and drill the holes in the top.  After the holes are drilled, we re-install the center support to help stabilize the top and then temporarily install the the other supports to mark the hole locations in the top for them.  After getting everything marked, we again removed all the supports.  Lots of steps forward and backward.

The remaining holes were drilled using the guide and angle adapter. A very fatiguing process to hold the guide on the underside of the top and drill the holes. The rotary tool was again brought into service to clean out the core material from these holes.  And finally, thickened epoxy was once again used to fill all these new holes.

So, after two days of work, we had holes in the top of the cabin roof and resin dots on the hardtop.  A lot of work but it doesn't feel like a lot of progress. I know I will feel differently soon though, after those last holes are re-drilled and the supports go on one last time to do their job holding up the top.


Wednesday, December 23, 2015

Of Course It's Raining

I know it is the holiday season.  In previous years I've done Christmas posts, but this year the holidays are pretty much postponed until we can get the project done and get headed south.  If you had told me I'd still be here I would have thought you were crazy...but here we are.

Work has continued.  We got the sail viewing window installed a couple days ago.  It should have been an easy task and only taken a couple hours, but it ended up taking us over a day.  Why?  Because I miscalculated the amount of sealant required.  When I did the salon windows, it took 6 tubes for each window.  This window is much smaller and the gaps are not as wide, so I figured one tube should be more than enough.  I was wrong.  We ended up being about a foot short of making the final bead around the glass and had to locate a second tube "locally" so we could finish.  The only tube of white 795 we could find was located in Norfolk.  With traffic and road construction it took most of a day just to retrieve the $8 tube of sealant.

The window was installed in a very similar manner to the process used for the salon windows.  Instead of using black sealant, we used white as it will be facing the sun all the time and I figured white was better than black.  Blackout (or in this case whiteout) was made by thinning some sealant with mineral spirits. Just like the salon windows, I used some weatherstripping to maintain the gap between the window and the frame.  In this case, the foam was only 3/16 of an inch thick and was white. The foam was placed around the inner edge in the mount and then a large bead of sealant was applied to the frame adjacent to the foam.  The window was then placed in position and another bead was applied around the edge and tooled with a plastic spreader.  Instead of using screws, washers, and spacer blocks to keep the window in position, we simply set a couple sandbags on it to hold it there.  Now it needs to sit for a few days while the stuff cures.

Window installed and held in place with sandbags

We are continuing to dry out the deck around our little D-ring issue.  We've rigged a hair dryer (we found at the local thrift store) so it blows air directly into the access hole under the deck.  On the outside, I rigged our Buckethead shop vac so it would suck air out through the holes in the deck.  I figured this would both help clean out any remaining bits of balsa that I couldn't get out with the safety wire as well as get a good amount of warm and dry air in the cavity to dry things out.

Applying warm air under the deck
And the vacuum pulling air through the fitting mount

Yesterday the welder brought over the supports for the top.  I was a bit surprised since I was expecting him to bring parts tacked together to test the fit, but they were complete.  Using only a couple of crude wood templates to measure the angles, he was able to construct the supports, and they fit well.  Only one very minor tweak was needed on one of them.  And the best part was that he was very reasonably priced. He usually does work for the local fishing boats and calls his work utility grade so the supports aren't the polished finish, instead they are more of a brushed nickel look.  I think this is good though, as it should help cut down glare a bit.  I think he did a little extra to make them look good, and they turned out really nice.

The front supports have arrived

If you are looking for a good and reasonably priced "utility grade" (he doesn't do polish work, but I would think you can get his work polished if you want) welder in the Gloucester VA area, drop me a line and I'll hook you up with Bob.

Naturally (as you might have guessed by the post title), it has been raining pretty much ever since the supports were dropped off.  I don't want to drill holes in my cored deck or cored top with all the water flying around, so it has put another crimp in our schedule.  Today, in the rain, I rigged a tarp to cover the front of the top and the surrounding work area, so with any luck we can get things moving tomorrow.  Meanwhile we spent a little time at the marina Christmas party and went out to lunch with some friends at the marina.  The remainder of the holiday celebration will take place once we are somewhere where shorts are appropriate attire.

Sunday, December 20, 2015

Random Bits I Missed

I admit I've been a bit scatter-brained lately.  Seems like I skipped over just a bit of the hardtop story. I also have a few other random bits to share.

First, we did get the back edge of the hardtop mounted to the arch in a more permanent sense.  After moving the hardtop, I drilled two holes for the 3/8 inch bolts that secure the two outer edges and temporarily attached the hardtop to the arch to keep it from flying away.  A combination of jack stands and a line run from the main halyard held it in position.

The next day I marked the location for the wire chase holes, and then we unbolted and moved the top about a foot forward so I had access for the hole saw.  We cut the holes in the arch and cleaned up the edges with some sandpaper.  I then applied a strip of white rubber weather stripping to the upper front edge of the arch to act as a seal between the arch and the top.  The strip could span gaps from 1/8 to 3/8 of an inch and should provide a weather seal between the two.  I will eventually caulk the seam as well, but this should work fine as a seal for now and as a backer for the caulk later.

Mounting bolt at the edge of the top.

We then moved the top back into position.  I cut some gaskets from a sheet of 1/16 inch nitrile rubber to cushion the mount points and allow for the minor irregularities in the surfaces.  We then re-bolted the top corners to the arch using the gaskets as well as the previous hardware.

Making gaskets.

Next I needed to add the additional bolts that will hold up the top.  These bolts will serve a dual purpose as they are also the bolts that hold the blocks for the davit system.  Unfortunately, the mounting flange on the back of the top didn't line up with the arch as well as I would have liked, so I had to devise some spacers to fill the gap.  Using the gasket material and some fender washers, I was able to secure the blocks and the top.

The davit bolts with spacers.

I was also able to find a welder who could create the supports for the front of the top.  He has come out and taken measurements and has one of the supports made thus far.  His work quality seems quite good, but he doesn't seem to do polish work. (I think he described his work as more "utility grade" but he seems to do a very good job).  That is OK with us though, as I think I would prefer a more "brushed" look to the supports anyway...should reduce glare.  With any luck, we should have the supports later this week.

I don't think a caption is really needed here.

That should get us to my last post where I discovered the issue with the D-ring.

In other news, I've now added two new pages to the blog.  The first is a list of places I've found where you can get marine grade parts at better than average prices (previously mentioned at the end of another post the other day).  I'm thinking of adding a services section to that list.  Right now the service section would be a pretty short list, but I may have at least a couple entries.

I've also added a projects page.  As some friends have noted, Blogger isn't the best at searching, and having a page with project overviews and links to the relevant posts seemed like a good idea.  Right now it has the hardtop project listed as well as my posts on LED lighting and the salon window rebed.

If you would like to see anything else on either of these two pages, drop me a line or post a comment and I'll see what I can do.

And one last relatively unrelated bit:  A couple days ago The Boat Galley blog did a post on some food grade, reusable dessicant packs they were reviewing.  In the post it spoke about the ability to dry them using a microwave.  Since those packs use silica gel as the desiccant, I did a little searching and found that, yes, you can use a microwave to dry silica gel.  I found instructions where you microwave the stuff for a couple minutes, check to see if it is dry, and do additional 1 minute cycles until it is dry. I tried it with one of the desiccant jars I made a while back and it works.  So, I no longer have to try drying the stuff in the oven, but can use the microwave when we are plugged into shore power or have the generator running. All in all a much better option than those DampRid buckets that are used once and thrown away.

Well, enough rambling for today.  Too much work left to do and we are pushing to get out of here as soon as we can.


Friday, December 18, 2015

Bad Boat Day

Some people have bad hair days.  When you are living on a boat you can have bad boat days (after all, we generally don't worry much about our hair).  Today was one of those days.  I guess I should have expected it having just had a nice positive with the move and partial installation of the hardtop...you know, yin and yang.

It all started when I got up this morning.  I usually make coffee before my wife gets up.  I grind some beans and put them in my AeroPress.  Then I proceeded to knock the AeroPress over, and the freshly ground coffee landed on the galley floor.  I'm a little grumpy before my first cup-o-joe, so this mess didn't help. I drag out the little shop vac and dispense with the coffee on the floor and grind some more. Fortunately there are no other mishaps, and I drink my coffee while checking the weather on the computer.

What?  Where did this 90% chance of rain in the morning come from?  Yesterday evening the forecast said nothing about rain.  I look out the window and sure enough, it's the one time the meteorologists got it right. Guess I won't be installing the window in the top today.  The forecast also showed that winds up to 15 mph were likely.  Now that the top is bolted on in the back, it probably won't just blow away; however, the front end is only resting on jack stands sitting in my cockpit.  After all the work we have put in on the thing, I figure the prudent thing to do would be to lash it down to the deck so it is held onto the stands just in case some stronger gusts make an appearance between now and when the front supports are complete.

I find some line and determine the D rings on the deck are a perfect place to tie it down as the line would be right across the front quarter of the top.  Then I remember that one of the D rings is a little loose.  Guess I had better fix that first. I wonder if I will need to make a backing plate for the D ring as I've found the backing plates on much of the hardware on this boat to be a little lacking. I open up the access panel to access the nuts on the back of the screws holding the D ring. Imagine my surprise when I find that not only was there no backing plate, there were no fender washers or nuts either. The screws were just dangling through the fiberglass like little sealant-coated metal stalactites. I look around and see no evidence of nuts or washers below them.  No metal, no rust, nothing. Apparently, the only thing holding this D ring in place was the failing sealant.  The only explanation I can come up with for the lack of retaining hardware is that I think the boat had been repaired in that area in the past.  I could see a worker going to install the D ring, getting the sealant down and then being distracted and forgetting to install the hardware.

Oh, and the sealant was failing.  Below the stalactites is a recess in the fiberglass.  This recess apparently has no where to drain and is full of water.  Hmm...wonder how long this has been leaking.  I go back up on deck and give the D ring a pull and out it pops with the bolts.  This is where I discover that the manufacturer didn't bother to seal the holes in the cored deck.  The result of this is that the balsa core (the deck is made of two layers of fiberglass with a core of end-grain balsa) is quite wet.  Actually, around the holes it passed wet a while ago and was more decaying now.

Cleaning up the D-ring mount.

I spend most of the rest of the day digging out wet and/or rotting balsa from three 10 mm holes using a bent piece of safety wire.  There is a trick for getting wet balsa core out of a hole where you can take an alan wrench or bent piece of safety wire, put it in a drill, and use that to dig out wet core from a hole.  But not in this case. The balsa core appears to be sealed into small-ish sections, with fiberglass dividing them and the D ring was mounted right over one of these dividers.  The wrench couldn't turn full circle without hitting the divider.  All I was left with was taking a bent piece of safety wire and tediously coaxing each little bit of balsa out of its hiding place. I did reach clean looking balsa about the time the sun was setting so now I need to let it air out and dry for a few days. Once dry, I'll do one last sweep to clean out any remaining loose bits and then fill the void with epoxy to make a permanent repair to the core and seal the core material so this won't happen again.

There was another little discovery while dealing with the D ring.  Remember that recess I mentioned that was holding water.  It sits at the top of the bulkhead that separates the hall and the shower.  While inspecting the bulkhead to make sure there weren't any other surprises, I found one.  The only saving grace is that it isn't too serious of a problem.  As I was "percussion testing" (a.k.a knocking on) the bulkhead wall in the shower, I hit one spot near the top and heard a slosh.  Not the click of solid fiberglass nor the dull thud of a delaminating fiberglass core, but the sound of water. The bulkhead wall appears to be fine, but water apparently made its way between the bulkhead wall and the plastic panel that lines the shower.  Looking across the surface of the panel, you could just barely see the slight bulge. Obviously the water needed to be let out.  The only solution I could think of, short of ripping down the whole panel, was to drill a small hole at the low spot of the bubble and let the water drain.

We have a fountain on our boat.

Not yet sure how to repair the panel or hole, but it does look like a nice place for a towel hook.

So, no work on the project at hand was done today.  Instead, it was spent preparing to repair other "discoveries".  Of course, I guess I can't complain too much.  If these problems weren't discovered, the issues might have become much worse, requiring much more extensive repairs. Such is life living on a boat.

Oh, and the welder I found did drop by to make a wood template for the supports so that was a tick in the positive column.  Guess I lied, a little work was done on the top after all.

Wednesday, December 16, 2015

Flight of the Hardtop

If you follow my Facebook page you got a sneak peek picture for this post. I was just too tired yesterday evening  to write this.

It has finally happened, the hardtop has made its way to the boat. The top has been ready for the move for a week.  When I went to let the yard manager know we were ready, his initial response was that they were very busy and probably could not do it until after Christmas.  This is the same guy that came to me a couple weeks earlier to tell me that they may have to move my work area because they needed the space for boats.  Fortunately when we went back the next day we were able to convince him to try to fit us in this week.  He said he would let us know when (we need a little heads up so we can take down the soft bimini and disassemble the work space tent). Since he said we could move into the slip we would use to place the hardtop at any time, we elected to move the boat over the weekend so we would be ready whenever they were (and also to make it a little bit harder for them to forget about us).

Monday it didn't seem like the yard was too busy, the staff was engaged in winterization tasks and some small projects.  One other boat owner in the yard was able to ask the lift operator to re-block his boat, and they did it within an hour or so of asking.  Since the yard manager wasn't here, I asked the guy that would likely be running the equipment for my move if (or maybe I said when) they could get my top moved to the boat. He asked if first thing in the morning would work. Naturally, I agreed.

And naturally, overnight the winds kicked up to 25 knots with gusts to 40 (enough to wake me up and send me out to check the dock lines at 2 A.M.). By the morning the wind died down a little, it seemed to be between 15 and 20 knots.  Those winds still didn't sound like a good thing to be playing in when trying to move a 12 foot wide fiberglass Frisbee.  So, we waited.  We cleaned up our work area in the yard a bit, took down the tent and took down the soft bimini.  Finally, around noon the winds died down into the 10 knot range and it seemed like a good time to try the move.

The plan was to use the large forklift (a forklift with really long forks that used to be used to launch small boats).  We would suspend the top by straps or lines underneath the forks.  This way we could walk the top out to the slip, lift it over the arch, and bring it into position on the boat. Once at the boat I would cut some 2x4's to length to make supports to hold the top in place while we attach the back and have the welder measure and construct the front supports.


The plan worked for the most part.  Once we got the top out to the boat, one of the yard staff suggested we use boat stands instead of the wood as this would allow me to easily adjust the position of the top before mounting it.  This turned out to be an excellent suggestion (thanks Kevin!). And thanks to the whole crew for the help getting the top moved and onto the boat.


Getting the top positioned and adjusted was a bit tricky.  The bolt locations and wire chase holes along the back edge don't leave a lot of room for error.  Neither does the clearance for winch handles at the sheet winches and clearance for the boom up front.  In hindsight, I probably should have made the mounting flange a bit larger, with the option to cut it down at the boat.  In any case, I was able to get it positioned where everything worked.

I don't know if it is the arch or the mounting flange on the hardtop (probably a little of both), but the mount points touch at the ends of the flange yet leaves about a 1/4 inch gap in the middle.  Fortunately I had planned to use a foam weatherstripping gasket to seal that back edge anyway, so it shouldn't be much of a problem. (I just need to run out and get some thicker foam...I only purchased 1/8 and 3/16 inch.)

After getting the top positioned as best I could, I drilled the holes for the two outer mount points.  Not an easy task given the angles.  I ended up using a close-quarter angle attachment on the drill and drilled from the back side through the access points in the bottom of the arch.  It made me a bit nervous, but I was able to get the holes positioned fairly well. I then used the 316 stainless steel hardware ( 3/8 bolts, 1.5 inch fender washers, lock washers, and nuts) I purchased at York Bolt* to temporarily bolt the top to the arch.  This, along with the boat stands and a line that looped around the top and is suspended by my main halyard, was enough to keep it secure for the night.


Now I need to mark the locations of holes for the wire chases. Then I need to move the top so I can drill those holes, apply the seal to the arch, and cut some rubber padding spacers from a sheet of gasket rubber I purchased from Hampton Rubber* before putting it all back together and adding the remaining arch mounting hardware (additional bolts, including the ones that hold the blocks for the davits).

Then I've got to hire a welder/fabricator to make the front supports while we install the sail viewing window. Almost there...finally.

*I'm working on a page of the companies I've found that provide marine quality materials at more reasonable prices.  It is a work in progress, but you can check it out here (or from the "Better Marine" tab at the top of the page).

Wednesday, December 9, 2015

To Skid or Not To Skid

On Monday I was able to go to a local boat supply store and pick up the extra gelcoat that I needed.  I don't know if I mentioned this already, but I'm actually using waxed gelcoat for this.  The reason...economics.  The gelcoat I started with, ClearCote, I purchased from the marina.  It didn't make sense to get waxed gelcoat since both were the same price.  Then someone pointed out that Kings Marine (a few minutes down the road) sells the same gelcoat for about $15 less, but they only stock the waxed version.

For the non-skid it doesn't really matter which one I use.  Normally, the purpose of the wax is that it makes its way to the surface to seal the surface from air and allow the gelcoat to fully cure. The technique for creating the non-skid texture requires that PVA be used to seal the surface because the non-skid breaks the wax film and could prevent a full cure.  But the waxed version can be used and, given the price difference, it was an easy decision.

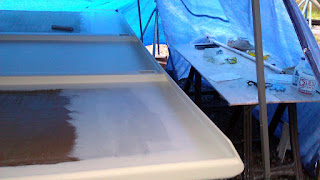
Now the weather forecast on Monday was that rain could be in the area but was likely to miss the northern half of Hampton Roads.  Yeah, right.  It rained off and on most of the day.  I didn't want to risk water contamination on the top, so we held off.  Instead, we decided to run another test in creating the non-skid texture since we have found that the gelocat we are using is different from the one I did the test with and the temperatures now seem to have an impact on how the stuff acts. We were able to determine that at around 60 degrees we could add one heaping plastic spoon full of fumed silica (about 2 tablespoons or so) to 2 ounces of gelcoat to get a reasonable result.

Yesterday the weather improved.  It wasn't very warm (I think the high was around 55 degrees F.) but the sky was clear with little chance of rain.  Inside our work "tent" we can somewhat control the temperature with the heater, so we did the application.  We prepped three mixing cups with 16 ounces of gelcoat, adding the 8 heaping spoons of silica and mixing it in well.  We then confirmed the temperature was about the same as it was during our test and catalyzed the first cup of the white goo.

I applied the same thick layer of gelcoat that we did during the test using a 1/4 inch nap roller.  We then catalyzed the second cup and repeated the process.  Then we used the loop texture roller to roll over the first section we applied gelcoat on.  To create the texture, you take this roller and roll the gelcoat as starts to thicken up during the curing process.  The first section wasn't quite ready so it created more of an orange peel look.  We catalyzed the 3rd cup and applied it.

After getting the 3rd cup on the top, we went back again and ran the texture roller over the first section. It was thick enough to make a texture, but the texture wasn't the same as it was the day before.  I just don't get it, gelcoat seems to behave differently every day we use it even when we pay very close attention to the temperatures and amount of catalyst used.  While it was different, it was "good enough" and so we kept going.

It was a difficult process to complete the top.  My wife would mix up the gelcoat and help with the texture rolling, and I would apply the gelcoat and work the texture roller.  Getting the timing right is a trick.  If you wait too long to try creating the texture, the gelcoat cures and you can't impart any texture.  If you don't wait long enough, the gelcoat flows back together into an orange peel look. Getting the timing right and getting each section to look like the last is quite a tedious trick.

In the end, we had one section we re-coated and re-textured because we missed the timing window and the surface was far too smooth.  It doesn't look perfect, but...as I said before...good enough.  After getting all the gelcoat on and textured, we quickly went around and removed the tape from the edges (before the gelcoat permanently made the tape part of the top).  I then applied the PVA to our work and cranked the heater up to help everything cure.

Non-skid applied and coated with the green PVA to cure.

The texture didn't hide the imperfections in the surface as well as we had hoped, but the top should be perfectly functional, looks "good enough", and means we are done with the fiberglass and gelcoat phase of this process...I hope.

Now I need to convince the boatyard to help me get it to the boat in a timely fashion so we can temporarily brace it up, mount it to the arch, let the welder get accurate measurements for the front supports, and get the window installed.

We are getting closer to getting out of here...yay!


Saturday, December 5, 2015

All White

Some days on this project, I just don't feel like I'm making any progress.  Then other days I do.  Today was one of the latter.  After spending way too much time applying gelcoat and then sanding it off, we got the rails "good enough".

Yesterday was spent preparing to apply the gelcoat to the body of the top. Using the sander with some 80 grit paper, I tapered the gelcoat "edges" to make a smooth transition from the handrail to the fiberglass surface of the top.  Then we applied a little more thickened resin to try and help fair (smooth) the surface of the top.  While that was curing (late in the evening with the heater running), we taped off that handrail that we just finished spending way too much time on.

This morning we awoke to temperatures just above freezing.  After being fortified with some coffee and getting the propane tank for the heater filled, we started the day trying to defrost and dry out the work tent.  About the time things were finally drying out I realized we were missing the spare roller cover for applying the gelcoat.  A run to the local Home Depot (I like their roller better than the one at Lowe's) and a quick stop for lunch (yes, it took that long to defrost and dry everything), we were finally ready to put some gelcoat down.

Using a hotplate and pot that my neighbor in the boatyard has, we warmed up the gelcoat to make it a bit easier to apply.  Just under a gallon of gelcoat later, the top is now completely white.

Masked off for the texture portion and first gelcoat application

Of course, this is only the first couple coats on the top side. We still need to add more gelcoat and create the texture.  Unfortunately, it is taking more gelcoat than we had planned and we aren't sure we have enough to finish the job.  So, we are debating our options right now.  We won't be able to get more of the same gelcoat we are currently using until Monday or Tuesday.  We could go to West Marine and pick up a gallon of gelcoat, but what they sell retails at about 3 times the price per gallon and has different characteristics in how it flows (the white does seem to be the same color though). We can alter they way we planned on applying the gelcoat to compensate if we want to.

Given the astronomical mark-ups that West Marine charges if you don't have a Port Supply account (Port Supply pricing can be less than half the normal retail price), I really prefer not to shop there unless it is an absolute emergency.  I just don't like rewarding price gouging behavior (if West wanted to be more competitive, I'd be more happy to shop there). Of course, getting this top done and getting out of here is getting to be an emergency of sorts and I would really like to have the top ready to go on the boat come Monday.

Guess we will see how we feel (and how the weather forecasts look) in the morning.

It's a Cold Morning

Frost on the dock and on the boat...but the sunrise is pretty...


32 degrees F means I'll probably get a late start this morning.

Friday, December 4, 2015

Top Cat

Work continues on the hardtop.  We patched the last two thin spots in the gelcoat, then found three more and patched them as well.  Apply gelcoat and then sand half of it off, feathering it into the surrounding finish...wash, rinse, repeat.  I keep trying to convince myself I love to sand, but it's not working.  As of this morning, I think we are done applying gelcoat...but then I said that to myself yesterday, so who knows what the light of day will bring.

But this post isn't about more sanding, instead it is about the cat.  Remember the cat that seems to have adopted us while we were in the boatyard?  Well, she continues to warm up to us despite the fact that the guy a couple boats down wants to adopt her.  I think we spend more time in the yard and have a bit more downtime (to pet the cat, of course) so she seems to hang around us most of the day. Hope she warms up to our friend soon; I think she will want a warmer home than my work space tent.

Yesterday she decided she wanted to help with the sanding...or maybe it was supervise.  Ok, she probably thought we were warmer places to sleep than the ground, but in any case...

I'm not in the way am I?

Don't mind me, I'll just sleep here
while you work.

I can't imagine why it is taking us so long to finish the top, can you?  I hope this cat understands that our dogs won't allow her on our boat (she has seen our dogs).

Monday, November 30, 2015

Marina "Wildlife"

In case you didn't figure out from the lack of posts the past few days, it has actually been nice here.  From Thanksgiving through yesterday it has been relatively warm during the day (the 60's and low 70's) and not raining.  So we have been working hard trying to get the finish on the top...er...finished. I could tell you how we spent the last several days repeatedly applying gelcoat and then hand-sanding most of it back off, but I won't.  I think I've previously mentioned all the issues with hand-applying gelcoat to make a smooth surface and don't want to bore you with more of the same.

About as smooth as we can apply this gelcoat.

The marina I'm staying at is in a bit more rural part of Virginia.  It isn't the west's version of rural where your nearest neighbor is 50 miles away, but there is some forested land here and there in between the houses. The homes I see on the roads here seem to sit on somewhere between 1 and 50 acres if I were to take a guess and there isn't a lot of empty land wedged in between them and the roads on this peninsula. Farm fields are still a bit further down the main highway and technically I think this is a town, but it isn't as densely packed as bigger cities or their suburbs.

Across the Severn river a couple mornings ago.
Not densely populated, but not that sparse either.

The reason I'm telling you this is because it is hunting season, something we are painfully aware of as we work out in the boatyard.  Off in the not-so-distant distance we hear a regular smattering of gunfire. I think someone mentioned it was deer season, but I don't know what they are hunting for sure.  All I know is that they don't seem to be too good at it. Often the shots are heard in groups of 6 or more, and one time I think I even heard a semi-automatic weapon of some sort being fired. The theory of being a good shot, making a clean kill, and not wanting the animal to suffer seems to be lost here.  And given the proximity of homes, property, and even this marina, I'm a bit concerned with what seems like less than good marksmen nearby. They recently put up no hunting signs at a local city park in the area. Fortunately we are surrounded by boats that should act as shields from most directions.  But it still amazes me how people are hunting on relatively small plots of land in close proximity to civilization.

Our new cat friend resting on her favorite
scratching post.

Back at the marina there isn't much in the way of wildlife (out of the water).  There is the kitty that has adopted me and my project and I think has taken up residence in the tent when I am gone.  She is definitely more comfortable with us than she was, and a guy with a boat two down from our project in the yard is trying to befriend and adopt the stray.  That same guy painted his boat a couple days ago and ran afoul of the other bit of wildlife we've encountered in the yard: bugs.  I don't know how these beetles did it, but they managed to get their backs stuck to his paint...which begs the question of how these bugs fly that they get stuck to a vertical surface on their backs.

It's hard to take pictures of the stupid bugs
with their backs/wings stuck in the paint.

Today it is cold and rainy so I don't know how much work will be done...and I had time to write a post.  We have a couple spots we sanded too thin and will need to reapply some gelcoat at least one more time.  After that, we just need to apply the non-skid gelcoat pattern to the topside body of the hardtop and we should be ready to move it to the boat.  So close, yet so far away.

Sunday, November 22, 2015

Rain, Cold, and Wind

Looking back, if I had one thing I would change about this project, it would be shelter from the elements.  The weather has dogged me the entire project.  I guess, coming from a state where it is sunny and not terribly hot most of the year, I just didn't think about how much of an impact it would be. I did try to find an indoor work space when I was looking for a place to build this top, but the only two I knew of were well south of my insurance restriction for location during the dreaded "H" season.

Building a makeshift shelter (or as I often joke about it, a refugee camp) has helped.  It kept the sun off of it during the summer and now it can help hold heat in a bit.  Unfortunately, tarps tied to a canopy aren't the best when it comes to rain.  They work for a little while, but stretching them over boat stands takes its toll and they start to leak.  I've replaced or reinforced a couple, but even then the drainage of water off of the tarps can be an issue.  The other problem with the shelter is the wind.  Using a propane forced air (torpedo) heater, I can get the "tent" pretty warm, but if the wind is really blowing, the heater is much less effective in the drafty shelter.

"Enclosed" work space canopy with 10 tarps

I'd consider getting a somewhat more substantial shelter (one of those pop-up car ports or similar), but at this point we are so close to completion that it doesn't make sense to plunk down the money on one.  A tent or carport large enough to fit the top, provide room to walk all the way around it, and room for a work table is a bit pricey.  If I had bought one at the beginning it probably would have been worth it (or, who knows, maybe it would have other problems of its own like heat build-up during the summer).  So, I make do with my canopy and the 10 tarps that are tied to the frame.

Panorama inside my workspace.  

Despite all of this, we have been making some progress on the top.  Discounting the hour or two it takes to setup and close down the tent each day, we have about six to 7 hours of working time.  On good days, I can raise the temperature inside the tent 20 degrees or more over the ambient temperature and that is good enough to get resin and gelcoat to cure. We were able to apply a weave fill coat of polyester resin to the top.  Yesterday we put gelcoat on the window opening and another coat along the top side of the handrails.  That took a bit longer than planned (seems that everything does) and we were running the heater until 7 PM so it would cure.

Today was cold with the high of 51 at 5 AM and falling ever since.  With help of the heater, I was still able to do a little wet sanding of the gelcoat (in this case the top didn't need it but I did). This evening the low is supposed to be around freezing and tomorrow is supposed to be windy, so I don't know that I'll be getting an early start in the morning.  Maybe after a couple hot cups of coffee...maybe.

P.S. The cat seems to like the tent, she often hangs out under the top while we are working...whenever it is cold or raining.  And this morning I found her sneaking out from underneath it when I arrived.

Monday, November 16, 2015

A Hole In The Top

After getting the top turned back right-side-up, it was time to add the window in the top so you can see the sails from the comfort of the helm seat. Since I have some left over plexiglass from the salon window replacement, I've decided to use it for the window.  I've sized the window so, if I decide I want an opening hatch there later, I can replace the fixed glass with a standard size hatch.

I decided, since I am using the same glass as the salon windows, that I would mount it the same way as well.  Instead of screws I will glue the piece of plexiglass in place with Dow Corning 795 (but in this case I'm thinking of using white and not black).  In order to accomplish this I need to cut a hole in the top with a flange that will allow the glass to sit recessed in the hole.  I will be using a router to cut the hole and then cut a larger hole half-way through the top.

We picked up some 1/8 inch thick lauan plywood and created a router template. I drew two rounded rectangles on the plywood that represented the full hole and the flange.  I then cut out the smaller hole with a jigsaw and smoothed it as needed with a little sanding.  I positioned it on the top at the correct location (a bit forward of the current window to accommodate solar panels) and attached a board to make it easy to re-position as well as clamp.  Using a template guide in the router I cut the smaller hole.  It took two passes with the router in order to cut all the way through the top, and I had to remove the template for the second cut and let the first cut be the guide.

Window template inner circle cut.
Not sure if the cat is trying to help or just wants attention.

After cutting the hole, I then cut the larger hole in the template.  Resetting the router depth, I could then cut out the flange.  Using a 1/4 inch straight cutting bit took a little while to clear out the material in the flange, but it worked well. I used a round-over bit to round the outer edges and sandpaper to round the foam edges.

Cutting the window flange. 

The next day we did what I hope will be the last fiberglass layup of this project.  Having just cut a big hole in the top and exposing the foam core, it now needed to be covered in fiberglass.  We sanded down the area around the hole on the bottom side to remove the finish (yes, the one we just applied) and allow for the fiberglass.  We cut strips of the 10 ounce fabric to cover the straight sides of the hole and chopped strand mat for the corners.  The temperature was, surprisingly, in the 70's and so we got the fiberglass applied.  Of course, by the time we were finished, the sun was setting and the temperature started to drop.  Out came the propane heater to keep the temperatures up and allow it to cure.

Window opening covered with fiberglass.

In addition the the hole, the template was also used to cut the plexiglass for the window.  By using the larger template hole and a larger diameter template guide, we could cut a window panel that gives about 3/8 of an inch of clearance inside the hole...just enough for the sealant to glue the panel in place.

The next day or two I expect we will be doing a lot of sanding (oh boy), hope it goes well...and quickly.

Friday, November 13, 2015

Sunny Side Up

I'd love to be writing a blog post about eggs (or any other subject) but, alas, it is yet another post on our fiberglass bimini project.  While the temperatures haven't been perfect, we have had a couple good (read dry) weather days and have been making some progress.  If the weather guessers are correct, it looks like we might have a few more nice days so I'm keeping my fingers crossed that we can make a lot of progress in that time frame.

In my last post I mentioned I was waiting for some rain to clear.  Naturally, it stuck around longer than predicted and we didn't get nearly as much done as I hoped that day, only managing to get gelcoat on the mounting flange at the rear edge of the top.  But the following day was dry and we spent the day applying gelcoat to the rest of the bottom side of the top.

The bottom is all white now.

Remember the experimenting I did early in the project to figure out how to get the textures I wanted in the gelcoat?  Apparently most of that experiment wasn't very fruitful as we have come to find that gelcoat can behave very differently with the subtle changes in temperature.  We ended up experimenting a bit as we went but came up with an option that was "good enough" (see...I'm learning). It is far from perfect, but it is the underside of the top, and as long as it is protected and doesn't create a lot of glare, we are moving on.

Front edge detail. The green is a combination of the green tarp
and the PVA used to seal the gelcoat surface.

So, the underside of the top is now done, with the exception of a small amount of patching I will have to do for the window opening.

The next step was to get the top flipped back over so we can make the cutout for the window and finish the top side of the top.  Fortunately the boating community is filled with good people who always help one another out. I was able to round up 7 other people at the marina, and we made fairly quick work of getting the top off of the table, out from under the tent, flipped over, and placed directly on jackstands back under the tent.  It seems like it has been quite a while since I've seen this side of the top.

To thank my fellow boaters for their help, we got some pizza, soda, and beer and had a nice little lunch in the boatyard.

Thanks for the help guys!

Next we need to create a router template for the window and cut the hole in the top.

Tuesday, November 10, 2015

Paint It Yellow

I can't believe I'm still here in Virginia working on this hardtop project. I knew I was being optimistic with the original theory on how long it would take, but we are over 3 times that now.  And it is taking a bit of a mental toll on us.  Hayes, Virginia, has lost its appeal and we really, really want to be moving on.  We know that this will be one of the best additions to the boat in the long run, but we need to get this thing done.

One of the largest issues seems to be the weather.  When we started the project, temperatures were so high that we couldn't lay up fiberglass until late in the evening.  Now the temperatures barely make it up to the recommended 60 to 65 degree (Fahrenheit) minimum needed for polyester resin and gelcoat to cure. Of course being outside, rain has also been an issue.  You can't get uncured or curing resin wet, and laminating resin doesn't like to be wet even after it cures since the surface is still tacky. Shielding our work from the elements has been a challenge.  Right now I'm waiting for some rain to blow over so we can hopefully apply more gelcoat later today.

Weather hasn't been the only issue, though.  As I've admitted before, I'm a bit of a perfectionist. This doesn't really work well when working in 3rd world conditions in a boatyard.  Don't get me wrong, I think the top is coming out very well, but my engineering mind sees the minor issues and wants to fix them.  Some of the imperfections have caused issues and taken a lot of time as well.

Still have a little gelcoat to apply to the underside before we flip it.

The handrails, particularly along the front edge of the top, are not perfectly straight and/or nice uniform curves.  The minor variances mean that when trying to smooth the gelcoat (we want the handrail detail to look good and feel good when you are holding onto it), it is very easy to sand through the coating. Gelcoat requires a thick layer to look good, and if it gets thin (what would be considered a thick layer in terms of regular paint) it becomes translucent. As a result, we've applied gelcoat, sanded it down, and repeated this process until there are only a couple thin spots left.  At this point I think we can touch up the thin spots and be good to go.  But it has taken a lot of time to get to this point. In hindsight, we probably should have just kept the minor orange peel texture that the paint roller created...oh well.

We've been here so long, that even one of the stray cats that hangs out in the boatyard has decided to adopt me.  Or maybe she just likes the shelter from the rain that three roofs (the canopy, the hardtop, and the table) provide.

Boatyard stray cat that seems to like us.

So, what does this have to do with the title of this post...well, I'm getting to that.  As a perfectionist, I've always had a problem with the concept of perfect being the enemy of good. One of the reasons I became somewhat dissatisfied with my career was that I wanted to do good work and most companies just wanted fast (let the customers find the bugs) and didn't care much about good. I became more forgiving with software but still refused to put out a bad product.  With something visual like this hardtop, I'm still battling with the idea of "good enough".

The "Paint it yellow" story came from a coworker a number of years ago.  My memory isn't perfect, so this may not be accurate, but this is how I recall the story going.  My coworker was working for a large software house.  As such large companies like to do from time to time, they do somewhat cheesy things to try to boost morale or motivate employees.  This company had a "caption this poster" contest where they had a number of poster images and asked employees to come up with motivational captions.  Among the posters was a picture of a bunch of yellow chicks with one albino chick in the mix.  I'm sure that the company was looking for something like "stand out in a crowd" or "don't be afraid to be different".  One of the employees, apparently having worked in the industry long enough, had what was a more appropriate caption for the poster.  His entry was "Screw it. Paint it yellow and ship it".  A short time later, the contest was cancelled and the posters were taken down.

But, for a perfectionist, this is an important lesson.  While it is admirable to always want your work to be the best, sometimes you just need to realize there is a point where it is "good enough".  I'm sure the top is better than good enough, now I just need to convince myself of that and get this thing done and on the boat.  But first, I guess I need to convince mother nature to stop spitting water at me.

Wednesday, November 4, 2015

If At First You Don't Succeed

Sorry for the sparseness of posts recently, but we have been pushing hard to try to get the hardtop bimini built and get out of Virginia before it gets much colder.

In the last post I mentioned we did a little gelcoat and sanding resulted in some bare spots.  Well, we managed to get gelcoat on the remaining handrail edge of the top and the result was similar all the way around. Given the third-world conditions in which I'm building the top, it isn't too much of a surprise that the surfaces aren't as fair as I would have hoped.

Working in the rain.

Then it donned on me that part of the issue may be in the application.  Brushing gelcoat on is not easy and the chance of getting a nice, even coat is unlikely.  So, we went looking for a small roller that would work around the curves of the rail.  Finding a small diameter roller was easy, finding a cover that works with gelcoat (or polyester resin for that matter) is a bit more difficult...they don't tend to list resin or acetone compatibility.  Best you can hope for is if they list that it is safe for oil-based paint and thinners.

The roller produced a much more even coating but it was also much thinner than the brush approach.  We did two coats with the roller and tried sanding things smooth and fair again.  Unfortunately, there were still a few spots that we sanded a bit too thin, but not as many and not as large.  So today, we applied another two coats and that should hopefully do the trick.

Because the bottom side of the top is facing up we are working on that side first.  The beams that run along the underside of the top divide the surface, so we also started applying gelcoat to them today.  Since it is difficult to reach the middle of the top from the sides, I climbed onto the top to do the "cut in" of the beams.  Unlike the handrails, we will not be making them smooth but will be applying an orange peel like texture to them.  Originally, I had thought of making them smooth, but with time running short, we decided it would be just too much sanding to get it looking good.  Application of the gelcoat with the roller can easily be given an orange peel effect if you run the roller over the gelcoat after it has been applied for a few minutes.  A few minutes running the roller over the gelcoat sure beats days of sanding and re-applying gelcoat.

Working at night...again.

By the time we were done today it was actually tonight and I was applying the PVA to our newly gelcoated surfaces in the dark.  Then the heater was again used to under the tent to aid in the cure.  Tomorrow we should know if everything worked OK.

Once we get the handrails sanded smooth (and without bare or thin spots), we can mask them off and paint the remainder of the underside of the top.  It will be getting the same orange peel texture to hide any minor issues with the underside finish and to reduce glare in the cockpit.

Wednesday, October 28, 2015

60 Degrees and Raining

My usual luck with weather returned yesterday.  I think the high may have been 62 degrees at sometime around 3pm and the gelcoat says don't apply below 65 degrees.  And while it doesn't explicitly say not to apply it in the rain, I think that is a safe assumption.

Fortunately version 2.0 of  the camp gave us the ability to apply a little gel coat anyway.  While some of the tarps are getting a little worn, one was still pretty waterproof and we were able to raise it enough to access one side of the top.

We mixed up some gelcoat, catalyzed it at the high end of the range (the bottle says to use between 1 and 3% MEKP) and brushed it on the starboard edge and the first couple inches of both sides of the top.  Then we fired up the heater to bring the temperature inside the tent to about 75 degrees.  Once the coat started curing, we turned off the heater, mixed up some more gelcoat, and applied it over the first, brushing it on at a 90 degree angle to the first coat.  Started the heater and let that cure for a little bit and then did one more coat. After all three coats had cured a bit, I brushed on some PVA (this is laminating gelcoat) and let the heat complete the cure.

Gelcoat curing under the heated tent.

Today the rain continued and I spent most of the day sanding and shaping the gelcoat after washing off the PVA.  I think it was due to the temperature, but for whatever reason, the gelcoat didn't flow as well when applied the day before and so a lot of sanding was needed to make everything smooth.  Since I don't have a real longboard sander, I'm using a drywall sanding block and it worked really well. As it turns out, even with 3 coats, there were still thin spots once everything was sanded smooth.  So, at this point, the edge shape looks really good but I will need to apply another coat and try not to sand through it.

The rainy weather is supposed to break tomorrow, so hopefully I'll have a bit better luck getting the gelcoat to flow and can get a nice even 30+ mil coat applied to the rest of the edges (so when I sand there will still be 20 mils or so left on the top).  With any luck, maybe I can get the rest of the edge done without sanding all the way through the gelcoat and having to reapply more.

Sunday, October 25, 2015

I Love to Sand, I Love to Sand...

I read somewhere, don't recall where now, that if you want to work with fiberglass you should get up every morning and look into the mirror and say "I love to sand".  Well, ever since my last post that is what we have been doing.  Sanding, grinding, or whatever you want to call it, a LOT of it needs to be done if you intend to finish the surface and have it look anywhere approaching nice.

Normally one would sand the entire surface smooth, apply the marine equivalent of body filler, then sand some more until everything was nice, even, and smooth.  Sanding would include use of a special hand sanding block known as a long board to make smooth curves, and I've heard this can be quite tedious.

In our case, we don't even have to sand a lot.  Outside of the fiberglass seams and the pattern of the weave of the fiberglass cloth, everything is pretty smooth. Most of the top side of the new bimini will be coated with gelcoat using a non-skid technique that will be thick enough to hide just about anything.  Most of the bottom side will be textured to reduce glare (yeah...that's the reason...definitely not because I just don't want to grind more fiberglass).  So, the only bits that really need to be rather smooth are the handrail edges of the top and the beams underneath.  And, for the most part, that is all we have been sanding...all week.

Sanding the top.

The problem I'm having with sanding has partly to do with the type of resin I am using.  There are two different types of polyester resin: laminating and finishing.  Laminating resin is standard polyester and, since polyester won't cure in the presence of air, the surface stays tacky so additional layers can be easily added and will chemically link together.  Finishing resin is polyester with an additive (a wax of sorts) that rises to the surface, cutting off exposure to the air, and this allows the resin to fully cure at the surface.  When building the top it has been advantageous to use laminating resin so I can stop at the end of a day and resume the next day (or two).  And since gelcoat is nothing more than polyester resin with color added, the laminating resin bond would be helpful there as well...as long as you didn't need to do much sanding.

...and more sanding.

Sanding laminating resin where the surface hasn't fully cured tends to gum up sandpaper quckly.  I could have used a finishing resin for the last coat (or added wax to the stuff I have or use PVA to seal the surface) so it would be easier to see, but then I would lose the chemical bond that will occur between the unsanded portions of the top and the gelcoat.  I'm not sure which is actually a better way to go, but this chicken-and-egg problem I decided to bite the bullet and just try to sand the laminating resin.  This took a lot of time and a lot of pieces of sandpaper.

The remainder of the pain was just from sanding fiberglass itself.  Fiberglass is rather tough stuff to sand, and the dust produced is, as I previously mentioned, extremely itchy. Every day for the last several days I thought "I'll finish sanding today and can start applying gelcoat tomorrow" and yet I would find more to sand.  This is where being a perfectionist is definitely a detriment.  One of these days I will learn that perfect is the enemy of good.

This afternoon I finally reached the "good enough" point...or was it sick enough of sanding...and decided it was time to apply some gelcoat.  At about 3 PM we applied some gelcoat to the back of the mounting flange.  It was a good place to start and test any techniques since it will be mostly hidden once the top is mounted.  Using a chip brush I applied two coats, making sure to brush the stuff on in different directions for each of the coats (I've been told this gives more even and complete coverage).

Finally, a little gelcoat.  Oh yeah, we also cut access holes
for the wiring chases.

The gelcoat I am using is a laminating resin as well, so after applying the stuff and letting it set up a bit (about 45 minutes), I had to apply PVA in order to seal out the air and let it fully cure.  The PVA was also applied with a brush, this time a cheap foam brush.  It did a good job of applying a thin layer of the PVA as best I can tell.  By this point, the temperature was dropping below 65 degrees, so we broke out the space heater to help it cure.  I think everything went well, but I guess we won't know for sure until we try cleaning off the PVA in the morning and try sanding the gelcoat smooth.

And that, in addition to applying more gelcoat, is what will be on tap tomorrow...if the weather permits.