We are still in Southport, North Carolina, waiting on the weather to improve enough to continue the trip. Cold and/or windy and/or rainy sums up the forecast for the last couple and next couple days. While we sit, it only made sense to knock a couple more items off the to-do list.
 |
| Weather Underground report this morning. |
Due to the cold weather, we decided to utilize an electric space heater in the boat. The reverse cycle air conditioning units can generate heat, but they get less efficient as the water temperature drops. Once the water temperature dips below 40F, there just isn't enough heat to extract out of the water. This boat, being designed for Caribbean charter, just doesn't have much option for dealing with really cold weather. In the process of using the plug-in electric heater, we found that a few of the 115v AC electrical outlets were in need of replacement.
Electrical outlets have a limited lifetime. Anyone who has owned an older home knows that the outlets wear out and eventually don't hold a plug all that well. And in the harsh marine environment, you add corrosion to that mix. The combination of poor clamping force on the plug and corrosion can cause a lot of resistance in the outlets. Resistance causes heat, and if you have enough heat...well, it ain't pretty. So, it was obviously time to retire the 15+ year old outlets on the boat. What to replace them with was the next question.
 |
| The old outlet and the new mounting "box". One of the corroded plug contacts below. |
Off I went down the rabbit hole of what is a good, marine-grade electrical outlet. I tried finding the plugs currently used on the boat, but they are, naturally, no longer made. Searching all the usual marine suppliers resulted in GFCI outlets touted as marine. We have two 15 amp 115v circuits on the boat and both are currently protected by newer GFCI outlets already, so we just need standard plugs down the line. The only standard plug provided by a marine supplier is a bright yellow plug that looks just like any normal household 3-prong outlet. In fact, looking closely at the picture showed it was made my Leviton. The information I found showed that, internally, it was no different than the normal weather resistant Leviton or other industry standard plugs. Since we prefer white to bright yellow, we decided to go that route for the replacements.
Naturally, as a boat project, this wasn't the end of the puzzles on the project. When attempting to remove the old outlets, I discovered that the factory didn't mount the plugs well (the holes were cut just a bit too large for the mounting screws), and a previous owner resolved the issue by gluing them in with silicone caulk. In order to make everything mount properly, I picked up some low voltage remodeling electrical boxes. These are basically the front edge of an electrical box (so it has the needed receptacle mounting holes) and can clamp to a hole cut in drywall (or in this case, fiberglass). Now the outlets can be secured in the holes without the need of silicone to glue them in place.
No sooner had we finish installing the new outlets than the boat decided to give us another challenge. We discovered that the reverse cycle air conditioner in our berth was not producing any heat. Checking out the system, I found the raw water pump stopped working sometime in the past few hours. Not good when the coldest temperatures we will experience on the boat thus far were only 24 hours away. Good thing we just finished the plugs so we could use the space heater that night.
The next morning we dug into the issue. We started with the obvious. Since it was a little past time for us to clean the sea water strainers, we pulled the strainers and cleaned them. Unfortunately the strainer on this unit didn't look that bad so it likely wasn't the issue. But, just to confirm it was a boat project, the strainer decided to leak when we put it back together. It took a while messing with it, but we were finally able to get it to seal properly.
Since I already had a little experience dealing with the raw water pump (this is the pump I previously replaced), I decided to dig into it to see if we couldn't get it running again. Attempting to run the unit this morning resulted in a small amount of water being produced, so there was some hope. I pulled the head off the pump (not an easy feat given its location in the bilge) and it became obvious what was wrong. The used pump I purchased had obviously been rebuilt, and the rebuild wasn't done properly. A spacing washer was missing from the impeller housing, and one of the spindle supports was broken. The missing spacer may have been the initial fault and the impeller rubbing on the housing may have been what broke the support, but I'm not really sure.
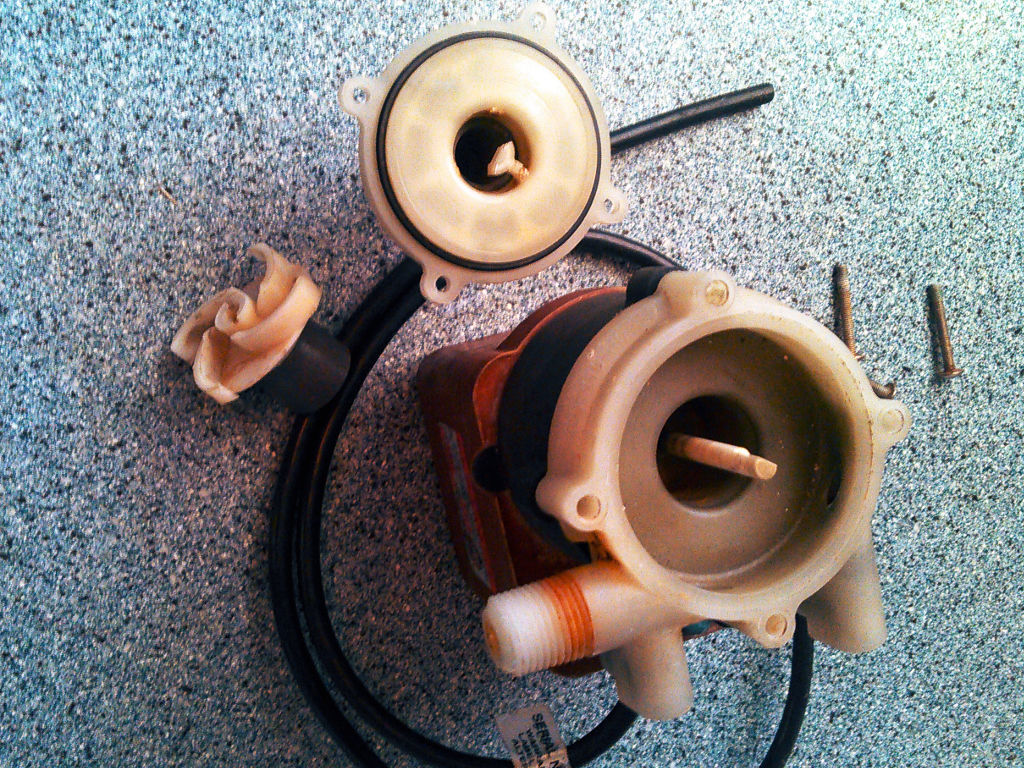 |
| March Pump. Worn cover with broken support top. Worn impeller left. |
So, just in time for the cold, we have all our possible heat generating items working again on the boat, although we would much prefer warmer weather.
No comments:
Post a Comment