Wednesday, May 13, 2020

Making the New Water Heater Last

On a boat, particularly in a salt water environment, a lot of corrosion occurs. We usually do what we can on a boat to prevent, or at least delay, the corrosion.  We use materials that are resistant to corrosion, we paint things, and we even use replaceable sacrificial metals to protect other metals.  Well...most of the time anyway...

If you recall in January when I returned to the boat, one of the items I had to replace was the water heater as it had developed a leak.  Well, I ordered one and did the replacement and have to say I've been happy with the results.  Hot running water is a nice thing to have...particularly for washing dishes and taking showers.  And I hadn't really thought of it much until a discussion on the longevity, or lack thereof, of boat water heaters occurred on the Leopard owners Facebook group.  The original poster was wondering...or complaining...about how he was only getting a couple years out of replacement water heaters.  And, of course, the heater he mentioned was the same one that I had just installed.  The usual types of replies about favorite brands and/or how nothing was made well anymore occurred, and then there was one reply that made me think...well duh, why hadn't I thought of that.

A sacrificial anode for the water heater. that
is made by the same company
Even cheap residential water heaters at the local big-box hardware stores come with sacrificial anodes installed.  Why on earth doesn't the boat water heater have one.  We have sacrificial zincs on propellers and propeller shafts, in engine cooling systems, on outboard motors, and just about any other piece of metal that touches the water.  But unlike every house on land, these water heaters don't seem to come with a sacrificial anode.  I guess that is why the boat water heater has a one year warranty when, for about the same price, a residential water heater comes with a 6 year warranty.  Well, as it turns out, you can actually buy a sacrificial anode rod for a boat water heater.  So, not wanting to go through replacing the water heater again in a couple years, I did.

Out with the old...
Since the boat water heater doesn't have a dedicated mounting location for the anode, they are designed to replace the existing drain valve on the water heater.  It was a bit of a pain to remove the plastic drain valve (it would have been much easier if I had known to do this before I installed the water heater...which is why I'm telling you about it now) as there is limited clearance with all the connections on the front.  Installing the anode with the integrated drain valve is easier.

...in with the new.

While it may look like the drain valve is much smaller now, the actual opening inside that plastic valve is not much, if any, larger than on the replacement petcock. So I'm sure it will drain equally as slow either way.  Hopefully this $16 addition will extend the life of my new water heater by a few years.

Monday, May 4, 2020

New Sunroom

After building the hardtop for the boat, one of the next items needed was a replacement dodger.  For those that don't own a boat, the dodger is essentially the front windshield for a boat.  It isn't strictly necessary as, unlike a car, you aren't cruising along at speeds fast enough that something flying in from the front isn't likely to cause injury...but anyone that has spent much time at the helm of a boat on a less than perfect day may disagree.  When we completed the hardtop in Virginia it was around Christmas and we were in a hurry to head to warmer locations.  At the time I jury rigged the old dodger so we would have at least minimal protection.

The jury-rigged temporary dodger.
During that cold and rainy trip south, it became very apparent that just a simple dodger up front wasn't really sufficient to protect someone at the helm from bad weather.  The cold rain always seemed to be blowing in from the starboard side and that made manning the helm a miserable experience.  So, back before this virus when I was looking at heading to the Bahamas in February, a better dodger and side protection...at least for the starboard side...was very high on the upgrade list.

Having an enclosure made was not going to be an option as that would be too costly for something just to improve comfort for the upcoming trip (small sailboat enclosures usually cost more than $4000 and I'm sure mine would be much higher due to the size).  A while back we purchased a Sailrite sewing machine and part of the justification of that purchase was to tackle projects like this.  My goal was to create a cost effective and serviceable solution that could be used when needed and taken down most of the time. Just like the hardtop, this would be my first time attempting to create something new for the boat, so higher end materials were less of a concern.  If I really screwed things up, at least I wouldn't feel as bad about it if the materials didn't cost a fortune.

First thing was to come up with a design. At first blush, it seems like a fairly straight forward process...create some fabric and clear vinyl panels that would enclose the front and at least part of the sides of the cockpit.  Of course, the devil is in the details.  I wanted to utilize the existing lower mount for the old dodger and then there was what to do about the sheet winches that are right in the middle of where enclosure panels would normally go.  Ideally, having all the winches inside the enclosure so you can stay dry while adjusting sails would be good, but in the end I could not figure out a way to make that happen.  In the end I came up with a design for a front panel and two smaller side panels that would wrap around behind the winches so that one could at least operate the winches with the panels in place.  I also planned for partial panels along the sides so the helm would be protected.

From there I came up with an estimate of how much clear vinyl and material was needed for the project.  5 yards of vinyl and 4 yards of material looked like it would be enough.  Checking online, I was able to find a supposedly marine grade vinyl for about $85.  Sunbrella, on the other hand was about $25 to $35 per yard.  I decided to check a discount fabric store in nearby Wilmington and found they had a roll of Sunbrella in an off-white color that just about perfectly matched my gel-coat for $17 at yard.  Another $100 worth of zippers, snaps, thread, pattern material, and other sewing notions from Sailrite as well as reusing a few zippers from the old dodger and it looks like I could make an enclosure for around $300.  On that trip from Virginia, I'm sure my wife and I would have gladly paid $300 for the added comfort of a dry helm out of the wind.

Creating the dodger pattern.
After watching and re-watching several of the how-to videos from Sailrite, I began the process of creating patterns for the front dodger. Of course, creating patterns by myself, outside, in the wind was a bit of a challenge. Trying to get the plastic stretched tight and marked before the wind would come along and blow it all down took several tries and in the end was not perfect...but good enough. Creating the dodger in the salon, when the dodger spans the distance across the salon and galley was an interesting task.  I cut the Sunbrella material into the numerous strips I needed using a straight edge and wood burning tool. Fortunately some of the tricks I picked up from the how-to videos as well as judicious use of the Sailrite seam-stick basting tape for canvas helped a great deal with the assembly and sewing tasks.  After a lot of sewing, I had a new dodger that took advantage of the extra viewing area afforded by the new hardtop.

Cutting long strips of Sunbrella
Next came the two small panels that ran behind the winches.  It was a pretty straight forward process to pattern and create those small panels out of the Sunbrella material.  These panels extend past where the existing mounting hardware was, so I had to add snaps to hold the bottom of the panels.  While on the Sailrite site I found that they had a new type of snap called a Snad that utilizes 3M VHB tape so I wouldn't have to drill holes in the hull for conventional snaps. The only downside to the VHB based solution that I've found thus far is that it takes up to 72 hours for the snaps to fully bond to the surface.

Sewing the dodger.
After getting the winch panels done, I realized I actually had enough material to make full side panels for the cockpit instead of the half-width panels that I originally planned to make.  I was having a difficult time determining how to best secure the half panels, so this solved that problem...but created another.  Snaps were less likely to hold such a large panel in place in the wind so I had to come up with another solution to attach the panel to the arch.  While trying to figure out the best way to attach the panels, I went ahead and created the panels.  When I made the hardtop, I included a design element that would hopefully aid in the installation of a full enclosure.  The bottom of the "handrail" edge around the hardtop can be slit at the bottom creating an awning track.  This track would then allow for installation of enclosure panels using a pre-manufactured bolt rope that slides into the slot. The solution for holding the panel to the arch is essentially the same solution.  I took the old awning track that came off of the arch when I installed the hardtop, cut it in half, and attached the segments to the arch.  One more zipper per panel and more of the bolt rope, and viola, the panel is attached.  The boat now has a 3/4 enclosure, with the back left open.


The end result isn't perfect, but it is functional and doesn't look too bad.  The vinyl isn't as optically clear as the expensive stuff (it has minor distortions that I think are due to the manufacturing process) but it is good enough and well worth the trade-off for keeping warm and dry. If I keep up with the maintenance of the vinyl (regular polish and UV protectant...same as is recommended for the much more expensive vinyl products), I have confidence that they will last a long time and will be a nice addition to the boat.

Friday, April 24, 2020

Provisioning Tricks and Tools

Provisioning for a longer trip is always an interesting task on a boat.  Having to plan what to cook for an extended period of time, how much to purchase, and how to store the provisions are tasks that anyone cruising on a boat must tackle (unless you are lucky enough to be anchored somewhere that has a boat "drive up" or delivery service like Pizza Pi).  In this time of COVID19 restrictions, even though many are not actively cruising, longer term provisioning is a similar task for anyone that doesn't want to visit a grocery store often regardless of if they are living on a boat or on land.  But where do you start.
My galley...which never looks this clean.
Unless you are one of those rare people that could appear on the food show "Chopped" where people whip up decent meals from random ingredients, you will probably need some recipes.  The old school card catalogs, recipe binders and books are one way to have recipes handy, but they can take up a lot of valuable space on a boat, are subject to water damage, and require a lot of manual work for  planning and provisioning.  One tool I have found helpful is a recipe app for my smart phone and tablet.  While electronics are still susceptible to water damage, having the data stored on multiple devices and taking some precautions to protect them will help ensure they are available when you need them.

In addition to storing the recipes, these apps can often help with meal planning and creating shopping lists to simplify provisioning tasks.  I originally started using an app called Pepperplate and found it to be adequate, if a bit glitchy at times.  Unfortunately, just as we were preparing for the Bahamas trip, the makers of Pepperplate suddenly sprung a paid subscription model on their users with no way to export their recipe data.  That behavior didn't sit well with me so I quickly tried to find a replacement  (they later provided a simple export after much backlash and a significant hit to their reputation among their users).  The requirements for the replacement application were:

  • It must work on Android and preferably on Apple devices and Windows as well.
  • It must store recipes in a local database so it works even with no internet connection.
  • It must have some ability to generate meal plans for multiple days or weeks.
  • It must be able to generate shopping lists from recipes and meal plans.
  • It must have the ability to import/export recipe data.
  • It should have the ability to synchronize data between multiple devices.
  • It should have the ability to import recipes from popular online recipe sites.
  • It should have the ability to scale recipes to vary number of servings.

With limited time, I narrowed it down to the two applications Paprika and RecetteTek.  Paprika is rather well regarded, but the trial was limited, purchase is per platform or per device and per major release (as best I can tell), and I didn't have time to dive very deep into its functionality before purchase as we were preparing for the trip at the time and I needed to manually rescue my data from Pepperplate before they shut me down.  I decided to give RecetteTek a try as it seemed to have most of the features I wanted and was free so my crew could also use it to help with planning without incurring an additional cost.  I'll do a review on it at some later point.  In general, these apps help make planning and provisioning easier and you end up with a shopping checklist of items to purchase without ending up with a bunch of missing ingredients or excesses.

RecetteTek with some of my
recipes and provision entries.
Another trick I figured out that is related to the recipe app is provisioning for other non-recipe or non-food consumables.  I created a "recipe" in the app that simply includes a list of snack and condiment items like popcorn, chips, candy, mustard, salt, and pepper as ingredients so they can be easily added to the provisioning grocery list.  Another has non-food consumables like toiletries and cleaners with estimated quantities of consumption for one person for one week (so you can simply scale the "recipe" for number of crew and length of time and then add it to the shopping list).  This way I don't forget to get the ketchup, dish soap, or toilet paper.

Obviously storage space is limited on a boat, and cold storage is at a premium so canned and dry goods, and recipes that can use them, are a great help.  Still, one likes to have fresh...or at least frozen...items around.  Of course, even if you are lucky enough to have refrigeration on your boat, that system has some quirks too.  Unlike the big refrigerators you find in the average American kitchen, the efficient boat refrigerators are often top loading, smaller overall size, and lack an air circulation fan.  The result is you can put a lot into a smaller space and they can run fairly efficiently on 12 or 24 volt power, but it takes a lot longer to cool or freeze items.

I've found 3 tricks to deal with the boat refrigerator.  The first is to realize the refrigerator is most efficient and works best when it is full, not empty.  So, if I don't have a lot of stuff to fill the refrigerator or freezer, I will place old milk jugs full of water in it to take up space and provide more thermal mass than the air alone.  Another trick is to never put anything warm in the refrigerator or freezer.  Since there is no circulation fan, all cooling is of a radiant nature and warm items take a very long time to come to temperature.  In the process the warm item can also warm up surrounding items which makes the whole thing less safe. The last trick, particularly for the freezer, is to package as much as possible in single serving or single use packages. Smaller packages take less time to cool before putting them in the fridge, can freeze faster than larger packages, can often make better use of refrigerator space, and doesn't require you to repeatedly thaw and refreeze items when you need some.

Turning a broccoli crown into multiple freezer packs using
the hints from the National Center for Home food Preservation.

One last thought about food storage...as this is what prompted me to actually start writing this post.  In this day of COVID19 I've found I'm taking a better look at how I am storing food on the boat.  I know that some things that we regularly refrigerate don't actually require refrigeration.  I didn't realize that cabbage, which seems to be refrigerated in the store, actually does better sitting on my counter than it does in a bag in the fridge. With the shortage of canned options, I've also been freezing some fresh stuff for later use.  I found this website that has recommendations and best practices for freezing all sorts of things (like the broccoli above).  The website theboatgalley.com also has many tips and tricks for food storage.

I hope this is helpful for your provisioning tasks...be it for a long cruise or just waiting out the current virus scare.  If you have other tips or tricks, I'd like to hear about them...so feel free to let me know in the comments below.

Wednesday, April 15, 2020

Keeping Busy

At this time I believe that most of the U.S., despite the lack of a federal mandate,  has some sort of restrictions on the gatherings and movement of people in an attempt to slow the spread of the Corona virus pandemic.  Most have some variant of a "stay at home" or "shelter in place" order.  The result of which seems to be a lot of boredom...to the point that people are <gasp!> even cleaning their own homes.  For a boat owner, finding something to do is pretty easy.  I've heard it said many times that if you think there is nothing to fix on your boat, you simply aren't looking hard enough.  In my case, it doesn't seem to take a lot of looking.

I think I've previously written about the work that I needed or really wanted to get done before making the trip.  A few things were known and there were many more that were discovered once I returned to the boat.  In hindsight, it is probably a good thing that there were so many items that resulted in delays to the trip, otherwise my crew and I may well be stuck in the Bahamas right now or figuring out how to make a direct sail back to the U.S.  If you are curious what is going on in the Bahamas right now with regard to boaters, you can click HERE to see the current (as of 4/15/20) situation.

Work on the boat does continue, albeit at a slower pace.  Part of that is due to the fact that it appears I will have a fair amount of time before this pandemic subsides so I'm not in a particular hurry now.  Another reason is that getting supplies has been complicated by the COVID19 pandemic response and other issues. There is also the conflict between the need of help for some tasks and physical distancing requirements/recommendations. 

The first delayed project has been the rigging.  Getting the rigging at a price that wouldn't scuttle the trip before it started was one of the first delays.  Now that I have the rigging, social distancing and travel restrictions prevent any further progress on that task for the time being.

The rigging finally arrived.  180 lbs or so.
Unable to find a suitable replacement dinghy at a reasonable price, the decision was made to try and refurbish my well sunburned dinghy.  Patch material, refurbishing paint, and replacement valves were ordered.  The patch that has leaked for as long as I have owned the boat has been re-patched and now holds air and another patch has been applied.  Initial base coats of the rubber paint has been applied and the dinghy now looks significantly better and holds air.  Unfortunately more base coat was required and the new can was found to have been partially solidified when it arrived, therefore a replacement had to be acquired.  It finally arrived yesterday, so naturally it is cold, rainy, and windy outside today.  But progress will continue on that project.

Dinghy original condition.

Dinghy after first base coats of restoration paint applied.

The partial cockpit dodger/enclosure was a project that I had planned to do before getting to the boat.  A trip my wife and I made from Virginia to Southport in early January, just after completing the hardtop build, emphasized the need for protecting the helm from the weather.  The front dodger was created a little while back and is up and functional.  After completing that part, I found I had enough material to do complete panels for the sides, so I altered the design and created those side panels.  Unfortunately, I was lacking a couple of zippers to complete the build and those arrived only a couple days ago.  So, that project is almost complete, again just waiting on the weather so I can do a final fit and determine the exact position for attaching the zippers and a couple additional snaps. 

Test fitting enclosure panels.
Since it appears that I will be on the boat for a while as the temperatures rise here in North Carolina, I decided to revisit continuing issues I have had with the raw water pump for the air conditioner.  After several attempts to repair the existing pump, the motor finally seized up and a replacement had to be ordered.  As is my usual luck, despite ordering the correct pump, the one that was shipped to me was not a 115 volt A/C pump but a 230 volt one.  That had to be returned and the correct one re-ordered from a more trustworthy supplier than Amazon.  The replacement arrived about a week later and was installed and I'm happy to report that the air conditioner is again operational.  Hopefully it will stay that way for a while.

My boat was a former charter boat and was equipped with several 115 volt AC plugs, but only one 12 volt DC plug.  Since the native boat power system is 12 volt DC, it is rather inefficient to convert power from the 12 volt battery bank to 115 volt AC using the inverter and then back to  DC voltage to power things like phone, radio, and flashlight chargers.  I have now installed two new 12 volt DC sockets to provide a more efficient means of utilizing the house battery power.  With the earlier addition of solar, the boat is now more self sufficient than ever before.

New 12 volt socket with USB charger in it.
There are other projects that I initially intended to defer until after the trip that are now getting some attention while I have time.  I wasn't happy with the velcro that was used when I initially recovered the salon cushions and have since reworked those covers.  I'm continuing to retrofit some of the lights with LED strips to further  lower power consumption.  I've finally managed to identify one of the leaks the boat had during heavy rains and will be looking at repair options for it.

Social distancing and my lack of desire to go to stores any more than absolutely necessary has also given me a chance to use supplies and practice techniques that come in handy when living in a remote anchorage or on passage.  Learning better techniques to store various fresh vegetables and what can be easily frozen to extend shelf life is a continuing process. I'm also getting better at controlling the boat oven for baking more delicate items like breads.  I've even tried Nido powdered milk that came recommended at The Boat Galley and have to admit it is almost as good as fresh and certainly suitable for baking and as a coffee creamer.

Speaking of not wanting to go out shopping, since I have a sewing machine handy, I offered to sew masks for the local hospital if they were in need.  Thus far, they have not indicated a need, but I am on their list of people to contact if the need arises.  I did create a couple masks for myself for if/when I need to go to the grocery store.  One of the other boaters here at the marina has a daughter that has an immune disorder, so I also made a couple masks for them. It was an interesting exercise to try and figure out materials I had on hand that would make a reasonable mask.  What I found was that non-woven fabrics were generally considered better than woven fabrics for trapping smaller particles.  What I ended up using for my own design (again, with what I already had on board...which was very limited) was the non-woven material used in some types of reusable shopping bags for the outer layer and a cotton bed sheet for the inner liner.  Since I have a spool of stainless steel safety wire, I used pieces of it to create the bendable nose bridge.  Although I can make no guarantees about the effectiveness of the masks, I'm reasonably confident they are far better than nothing. 

So, in these strange times, I continue to keep myself busy.

Saturday, March 28, 2020

The New Normal

Well, this is certainly not a post I envisioned when I headed out to the boat to prepare for the trip to the Bahamas.  Up until recently I've been working hard to get the boat back into proper cruising shape and I think it is about there.  There is one big item left...but more on that later.

Unfortunately, while I was busy working on the boat, the SARS-Cov-2 (Coronavirus or COVID19) virus was busy spreading across the planet.  For a while, perhaps fueled by some of the mis-information that was available at the time, I had held out hope that the spread would slow or not reach the more remote places and small towns where I am or intended to travel.  Unfortunately that turned out not to be the case at all.

Around the time the replacement standing rigging finally arrived at the boat, it was increasingly evident that the trip was not likely to happen.  My help had gone back home several weeks prior while we awaited the creation and delivery of the rigging and it was obviously unwise for him to return to the boat once the rigging made it to the boat.  It also seemed like a bad idea for me to pack up, drive more than half-way across the continental United States and return home.  The idea of all that public contact by staying in hotels (if they were even open), eating fast food, and getting gas and supplies for the trip would only increase my risk of coming in contact with the virus and possibly spreading it with me.  So, I decided that I would "shelter in place" and take the time to continue working on the boat...albeit at a slower pace.

In some aspects, the cruising lifestyle lends itself rather well to physical isolation.  If you are on your boat and are well provisioned, it is fairly easy to isolate yourself from society for a relatively long period of time.  Unfortunately, if like me, you have not yet provisioned for a trip, all of the panic hoarding of supplies has made it almost impossible to provision now.  Trying to get groceries and supplies for a week or two can be an exercise in frustration.  Not only are you met with bare shelves, but physical isolation seems nearly impossible as everyone seems to crowd the stores trying to find coveted items like fresh meat, canned goods, cleaning goods, and toilet paper. Fortunately I was partially stocked for a trip with four people, so I do have enough to get by...at least until our supply chain can catch up and some of the panic hopefully subsides.

Amid all the bad panic behaviors, there is also what seems like a sizable contingent (at least here in relatively rural North Carolina) that still believe this is a hoax, or just another flu, or will somehow disappear in a few weeks, or for other reasons that escape me, seem to ignore hygiene and physical distance recommendations of the scientific community. While I'm not at anchor and completely isolated, I am glad that I am at the farthest slip out at the far end of the marina, so there is very little traffic around my boat.

My hope is to reschedule this trip once all of this blows over.  In the meantime, I have a number of projects to work on...guess that is another advantage of owning a boat in these times...there is always something to fix or improve on a boat. I should also have a bit more time to catch up on blog posts. 

Hope you are all staying safe and finding good ways to pass the time.

Monday, February 17, 2020

Power of the Sun


As I eluded to in my last post, there is one project, or upgrade, that made the list along with the repairs, and it is something that I had wanted to do since before we built the hardtop. When Doug, my crew that came to help out with some of the repairs on the boat, came up with a system that wouldn't cost too much more than the fuel I anticipated we would use with the generator on the trip (at Bahamas prices), I decided it was a worthwhile investment.  I'm, of course, talking about adding solar power to the boat.
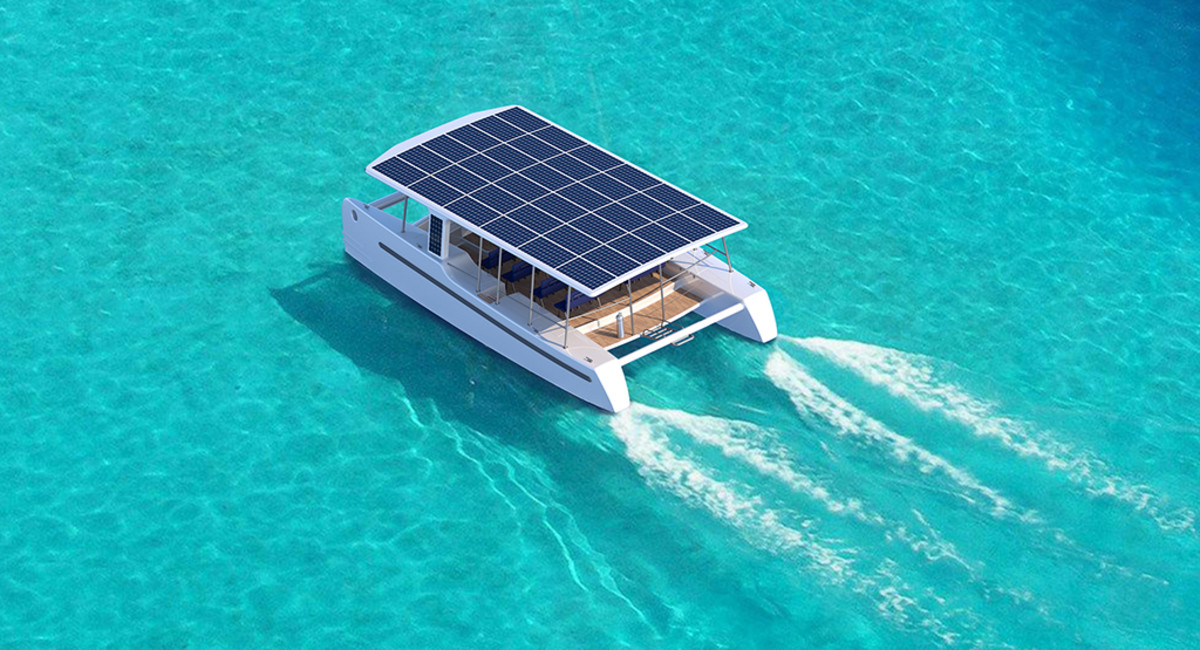
SoelCat 12, an autonomous solar electric catamaran
No, this is not my boat.

When I was designing the hardtop, I intentionally moved the sail viewing window forward just a bit in order to allow for the larger size panels you often see in residential applications as well as building in wire chases that could be used for solar.  At the time, getting panels for around $1 per watt was a very good deal.  Now the power output has increased and prices have fallen and you can get 320 watt panels that should put up with the marine environment for under $0.60 a watt.  He also found a MPPT solar controller that was getting pretty good reviews for $150.  A couple lengths of 6 gauge wire from the controller to the batteries, the special 10 gauge wire for hooking up the panels, a couple breakers, a wire gland for sealing the wire chase hole in the hardtop, a special tool for installing weatherproof MC4 connectors on the wires, and a couple other odds and ends for installation and I'd get "free" power from the sun.  Since Doug would be passing nearby the solar panel supplier on his way to the boat, it would also save me the (not insignificant) shipping cost for the panels.  The whole system would end up costing me around that magic $1/watt number that used to be reserved for just the panels.

The first step in the process, after getting all the materials to the boat, was to drill new holes in my beautiful hardtop.  Having worked so hard on that top, I had mixed emotions about drilling 5 holes for each panel in it...but if I wanted solar it had to be done.  We brought one of the panels to the boat, attached the mounting brackets to it, and marked the four mounting hole locations for each panel.  We carefully determined where the middle of the wire chase was on the underside of the top and marked the larger hole for the wire chases.  Using my drill guide, I drilled oversized holes until we reached the bottom fiberglass skin, cleaned them out, filled them with epoxy (the top is foam cored, so I needed to create a sealed "sleeve" for the holes that would also act as a compression post to tighten bolts), and drilled the smaller final size hole at each location.  It all sounds simple enough, but this is a boat project so we had to fight weather, wait for epoxy to cure, as well as other issues so making the holes ended up taking 3 or 4 days to complete.

Carefully locating the center of the wire chase.

While waiting to complete the holes in the hardtop and get the panels mounted, we installed the solar controller, breaker, and wiring from the controller to the battery bank.  The solar controller and breaker were mounted in the engine room next to the original battery charger for the boat. The wiring was run from the large main bus bars below the main electrical panel (think of a bus bar as the extension of the positive and negative posts of the battery bank), through the breaker, and on to the controller.  The controller connection was another interesting problem to solve.  Our calculations showed that we should use 6 gauge wire for the charger, but the charger terminals would fit at most a 9 gauge wire (remember the larger the gauge number, the smaller the wire).  Since the controller is rated for 60 amps, it has two connectors for each of the positive and negative battery outputs and the instructions said to run two wires to the battery...probably done to save in production costs of the charger.  Well, I didn't want to double up wires. It turns out if you take a 6 gauge wire, strip off the cover, divide the wire strands in half, and re-twist them into two conductors you end up with two 9 gauge wires.  So, that is exactly what we did to the end of the 6 gauge wire cable.  Marine grade wire cables use thin diameter strands of wire for the conductor (for added flexibility) so it was a fairly easy process. Seal it all up with quality adhesive lined heat shrink tubing and viola, a custom single cable that hooks up to the controller. A few zip ties and zip tie mounts and the cables were installed.


Drilling and filling holes in the hardtop.

Once all the holes in the hardtop were ready, we mounted the solar panels and sealed the top sides of those holes with butyl tape.  We then used an electricians fish tape to pull wires from each of the solar panels through the unsecured gland boxes, the chases in the hardtop, and to the access panel in the top corner of the targa (arch at the rear of the boat).  There we used two Y adapters to connect the solar panels in parallel and ran the resulting single set of wire down the rest of the arch, into the engine room and over to the controller.

Making the custom connection wires.

After wiring the controller up, were now ready for a test.  Of course, we were ready at about 5pm and the sun was a short time away from setting, so this wouldn't be a real test of power generation, but it would be enough to verify everything is hooked up and working.  We flipped the breaker on the battery connection and the controller came to life and recognized it was connected to a 12 volt battery bank.  A few parameters were set in the controller and then the solar panels were connected.  We have power generation!  It was only about 150 watts coming from the panels and a couple amps going into the batteries (I don't recall the exact numbers), but it was proof that the system works.

Solar controller mounted next to the original charger.

The next day we did a second test.  It was fairly sunny and right around noon and....wait a minute.  It was only showing 150 watts from the panels and under 10 amps going into the batteries.  Oh yeah, need to turn off the regular charger and drain the batteries a bit...it was doing a constant voltage topping charge because my regular charger was taking care of the batteries while I'm plugged in at the dock.  I used the inverter and a space heater to pull some energy out of the batteries and then tried again.  That's more like it.  Even with the boat sitting so that one panel tilts a bit north and the sun was at best about 45 degrees from overhead, we were seeing 460 watts coming from the panels and 31 amps (at proper charge voltages) going to the batteries. Yay!

Data from the Android App.

I finished tidying up the wiring and checked the connections with my non-contact thermometer to make sure there wasn't any resistance causing heat build up.  We then reinstalled all the access panels and I glued down the wiring glands on the top so it is again waterproof.  The only thing left to do on the install is figure out some sort of skirting for the panels so lines don't accidentally get hung up under the panels.

Panels Installed except for line deflection skirting.

In the days since the initial install, I have run a number of other tests and found that, as long as I'm not running electric heaters or air conditioners, the setup seems to keep the batteries charged.  Of course the real test will be sitting at anchor when I have to use the inverter (or...shudder...the generator) for 120 volt AC service. 

I also found a glitch in the solar controller.  It was rarely going into its float charge state.  I contacted their technical support (which only seems to be available via e-mail) and found that the charger has a hard coded value for the switch over point from topping charge to float charge and doesn't take into account the recommendations of most of the battery manufacturers or size of the battery bank.  For most solar installs that have loads that take power most of the time, this isn't really an issue as charging time is limited by sunlight hours.  The only time it comes into play is when the battery is fully charged and there isn't a load (like a boat in storage). I was informed that, at the price point of the charger, the manufacturer would not change the programming of the device to better align with the lead acid battery manufacturer recommendations. Fortunately there is an easy work-around by simply setting the controller to limit the charge voltage to the lower values used for float charging when the system isn't actively used.  With the WiFi feature of this controller, it is easily done.  Not the ideal solution, but good enough for my purpose.

Overall I'm happy with the result.  One of the things I really hated was to have to start the generator in an otherwise peaceful anchorage in order to recharge batteries.  With this addition, I hope I won't have to do that very often.  Not having to burn fossil fuels in order to produce energy is also a good feeling.


Friday, February 7, 2020

If it ain't broke...it ain't a boat

Work on boat projects continue.  Spending a bit of time on the boat, we've run across a number of items that were, after two years of sitting alone, were need of repair or replacement.

Things like interior lights and the stereo are not really mission critical systems, but enhance the utility and enjoyment of the boat so they are getting replaced.  The water heater, also not critical, was leaking our fresh water supply so it obviously needed to be repaired or bypassed. The sump pumps are a bit more critical, so they too required attention. The dinghy, aka the family car, is a must have as basic transportation.
The installed new water heater

New USB/Bluetooth stereo
Something I seem to have forgotten but have definitely been reminded of is that it always takes longer to do a task on a boat.  Cramped spaces, a rocking platform, limited tools and supplies, the "creative" solutions of prior owners or maintenance people and the weather all play a part in slowing down what would be an easy task on land.  On Youtube there are many helpful videos on maintenance, but the videos are usually shot in a nice studio with plenty of lighting and the part in question (usually a brand new example of the part) sitting neatly on a bench.  I would love to see a video where the demonstrator was busting their knuckles on bulkheads and other sharp objects trying to access the part...then I'm sure the videos would be much longer with a lot of "colorful metaphors" being beeped out in post production.  They would also be more of an accurate representation of how the process goes.  Oh well, at least there is some instruction available.

Yeah...how about you demonstrate on mine...
...and I consider this pretty accessible. The mounting
screws are right behind the big waste hose.
One critical system that was questionable was the standing rigging.  The wires that hold the mast up and make this a sailboat are pretty critical as you definitely don't want it to come crashing down while on passage.   Weather had been playing a part in delaying the inspection as one doesn't want to be freezing and flapping around in the wind while attached by a rope to the top of the mast.  About a week ago, I was finally able to go up and do an inspection.  Unfortunately, what I found only confirmed my fears of what I thought I had observed via binoculars from the dock.  There was some surface corrosion (which in itself isn't necessarily bad), but there was also some rust lines that follow the strands of the wire (called candy caning as it looks like the twisted stripe of one), a small amount of pitting, and a few small bulges in the thickness of the wire.  The latter are indications of corrosion taking place in the inner strands of the wire.  So, it looks like replacement is necessary for safety.

Yeah, gotta replace those wires.
Trying to measure the rigging so I can order replacements is also not the easiest of tasks.  Ideally, the mast is unstepped and the rigging cables can all be taken to a shop, measured, and replacements constructed.  Since there is no place nearby where I can get a crane near the boat in order to take down the mast, we will be doing it once piece at a time while the mast remains standing.  This means ordering the cables with special fittings on one end so the cables can be cut to the final length and the fitting installed at the dock.  Doug, the crew member that graciously offered to come down to help, and I took turns going up the mast in order to get the measurements.  Thanks to the weather and some technical challenges in measuring wire paths while dangling nearly 60 feet up in the air, it took two tries over three days to get the measurements done.  But we did get them and were now armed with enough information to order replacements.

Inspecting the rigging on a less than ideal weather day

Doug took a selfie up the mast on a nicer day.
Previously, primarily as an overabundance of caution, I had looked into replacing the rigging.  What I had found was that some riggers were unable to even source some of the parts required and others were unable or unwilling to work with the special cable used to rig the boat (swaging fittings on compact strand wire is more difficult due to the "compactness" of the cable).Being the DIY type of person (if you aren't DIY, you had better be rich to own a boat) who wants to cut the rigging to exact length and install boat-side, I am also looking for swageless terminals to avoid the swaging issues.  Looking into sources for rigging, I quickly ran into similar problems.  I currently have a call in to the original manufacturers of the rig and it sounds like I may be able to get the parts directly from them...in South Africa.  I've been told, if they have the parts the turn-around time on an order should be under a week...now I just need to figure out what it will take to get it half way around the world.  Unfortunately, communications have been slow with them.

While I await answers on the rigging, a number of things are getting done.  The two manual emergency bilge pumps were disassembled, cleaned, reconditioned, and are now effectively pumping water.  All the winches have been serviced.  The dead stereo has been replaced with one that now supports bluetooth streaming as well as USB thumb drives for music sources. A newly discovered glitch in the refrigerator was researched and "repaired" by simply exercising the thermostat control.

Not everything is repair.  I finally came up with a design for a simple replacement dodger that deals with the issue of strange angle of the mounting of the main sheet winches.  I was even able to get a good deal on the Sunbrella material needed to make the dodger and get other items ordered.  There is one other project in the works, but I'll save that for another post.  It is something I had planned to do a while ago and I think it will be of great benefit for the trip.

So, the work continues...but hopefully I'm seeing a light and the end of the tunnel and am really looking forward to some relaxing time in the Bahamas.